Have you ever had to open your gun safe in the dark and had to fumble around for a light so you can access your items? What if in an emergency you couldn't turn your light on but needed access to your gun for protection? The Liberty Clearview 6 Wand Safe LED Light Kit features bright LED lights that can illuminate your gun safe (up to 66" or 72" tall), closet, or even a cabinet with outlet access.
The benefit of the Liberty Clearview 6 Wand Safe LED Light Kit is that it turns on with motion. No need for any switches. Just open the door and the light turns on. When you shut the door the light turns off. With the self-adhesive backing, you can easily install this light kit yourself. Because of its size, it will light up the entire interior of your safe and not just a portion.
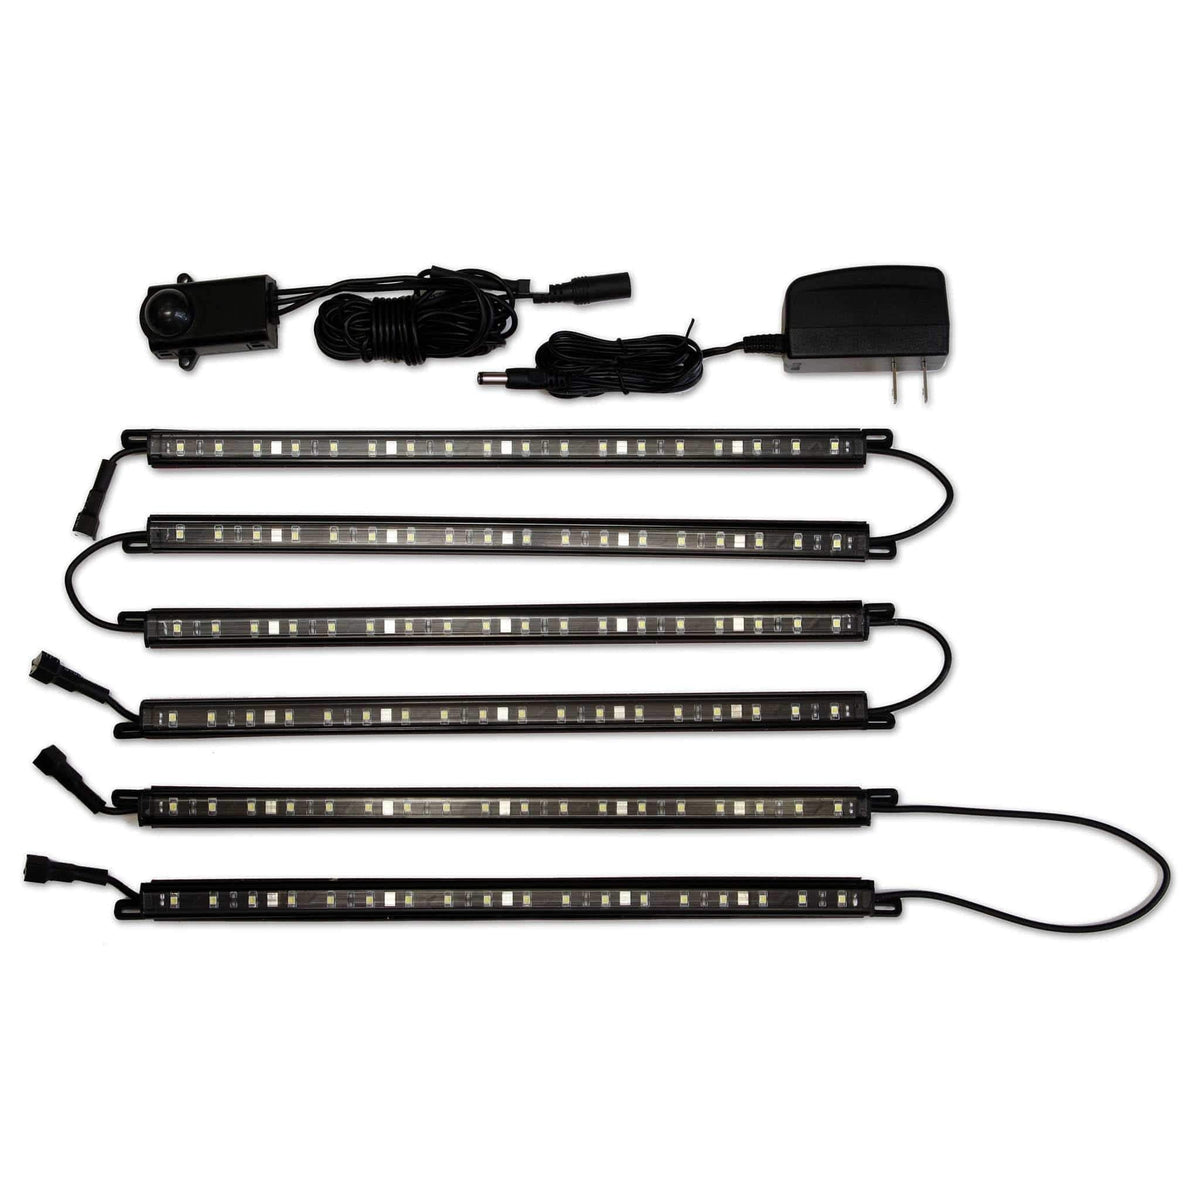
Included in the package are five (6) light wands with secure twist-lock connections and a 110 outlet 12V adaptor included. This allows you to plug these lights into any standard power outlet just like any normal plug. If you don't have a power outlet kit in your safe, we also sell those here and here. The total length of all the cords and lights is 15 feet.
If you have any questions regarding the Liberty 10793 Clearview 6 Wand Safe LED Light Kit, please give us a call at 800-207-2259.
Features:
Fits up to 66 or 72" tall safes.
Bright LED lights illuminate safes, closets, or cabinets with outlet access.
Includes Six (6) light wands.
Each wand is 12" long and has (18) LED lights.
Auto On/OFF motion sensor.
No switches. Lights stay cool during operation.
Secure twist-lock connections.
Self-adhesive backing.
110 outlet 12V adaptor included.
Included Contents:
The total length of all cords and (6) lights is 15'.
Additional lights cannot be added to this kit.
Installation Instructions:
Identify: (a) Sensor, (b) Hinge Side Wand Light Strip (2 Wands), (c) Opening Side Wand Light Strip (4 Wands), (d) AC Adapter.
Plan the position of each kit component. The Sensor (a) should be placed on the hinge wall, about 6" from the floor, and 6" from the front of the safe. If it is mounted closer, it may be crushed by the door. It can also be mounted directly to the shelf rack.
The open side wand light strip (c) should be in the left front corner of the safe, clear from the door bolts or door adjusters.
The hinge side wand light strip (b) should be mounted between the hinge cups, and not over them.
Do not install light strips along the top inside of the safe, unless your door does not have bolts that come out the top of the door.
Peel the adhesive backing of the hinge side wand light strip. Install the two strips tightly in the corner of the safe, between the hinges on the door so they do not get damaged when the door is shut.
Peel the adhesive backing of the opening side wand light strip. Install the four strips tightly in the corner of the safe, out of the way of any door adjusters.
Install the motion sensor to the safe wall in the position described in 2a above.
Plug the wand lights into the connectors on the motion sensor (twist to lock connection). Plug the AC adapter into the motion sensor, then plug the AC adapter into the outlet on the inside of your safe. If your safe does not have an electrical outlet installed, they are available here and here.
Tuck the excess wiring into the interior corners of the walls and floor.